Predicting Manhattanhenge

There has been a lot of talk lately about the Manhattanhenge, the 2 days in the year when the sun sets in the alignment of New York streets (thank you city grid design).

Manhattanhenge By @NYCphotos-flickr

It’s awesome to see so many pictures like this popping up on flickr and instagram because this way I also get to confirm my little app Sunsetter is actually giving correct results:

Manhattanhenge prediction on Sunsetter

Note: the app is configured to predict when the sun’s lower limb touches the horizon, not the civil sunset when the sun completely disappears behind the horizon, as this makes for a better picture.

Tokyo is not an easy city to take such pictures but so many cities in the US have the potential. For example, I’m hoping to see many pics from San Francisco on September 24th.

SF-henge

Pet Project: Sunsetter

At home I have a nice view of the Fujisan to the south-west. I often take pictures of it in winter when the skies are so clear.

Many times I’ve told myself it would be nice to take a picture with the sun setting right behind the mountain. I’ve searched the internet for an app that would tell me when this happens but all I could find were apps that tell you where the sun sets on a particular day, not the other way around. So I decided to build it…

Sunsetter is a simple python web app running on Heroku. It’s based on the brilliant pysolar library for the hardcore astronomical calculations and binds it all to Google Maps with a dash of Ajax and JavaScript.

The app still needs polish but the data it gives out should be pretty accurate and reliable at normal altitudes (standing on top of a very tall mountain overlooking a wide plain will change the distance of the horizon and screw with the calculations a bit).

If this app was useful to you or you have suggestions, I’d love to hear from you in the comments.

Update (2012-06-03): I’ve open sourced the code on Github.

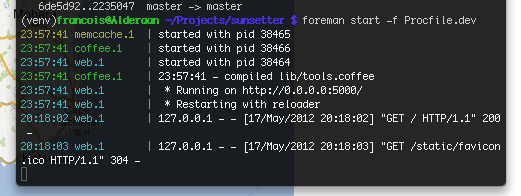
Foreman and Procfile tips&tricks

Lately I’ve been playing around with the Heroku stack and I’d like to share little tricks that might be common knowledge but which I’ve not seen mentioned on the Heroku standard documentation.

So the doc tells you you must set your Procfile as such (for a Python app):

web: gunicorn app:app -b 0.0.0.0:$PORT -w 3

You can then run the webserver on your machine for development with the command:

foreman start

But if your app also uses memcached, redis, postgres or others, then you must open as many additional tabs in your terminal to run each service (I don’t want to have the daemons running all the time on my all-purpose macbook air).

What you can do to make your life easier is to create a new file Procfile.dev which you should add to .gitignore (so that it is not uploaded to Heroku and does not affect your production environment) and add all those services in there:

web: python app.py
memcached: memcached -v
coffee: coffee --watch --output static/js/ --compile lib/

And run it with:

foreman start -f Procfile.dev

This will launch my app with standard Python (easier for quick debugging than gunicorn), my memcached instance and even compile my CoffeeScript on the fly so I can edit freely while testing my changes.

Looking in your terminal you’ll even see each service logs all pretty and color coded.